Continued from Part 1.
04/03/18
It's been tedious, but I've gotten the headstocks to a point where I was happy enough to start painting. Not too bad after the first of the red topcoat.
As I forgot to mention in the last headstock photo, I drilled a new 3mm hole in the centre of where the Accucraft chopper coupling was fitted, on both headstocks. I've ordered a pair of Darjeeling couplings from IP Engineering, which I think have an M3 stud sticking out the backside for a nut to secure it. Well, that's what all my generic IP centre buffers have.
As I forgot to mention in the last headstock photo, I drilled a new 3mm hole in the centre of where the Accucraft chopper coupling was fitted, on both headstocks. I've ordered a pair of Darjeeling couplings from IP Engineering, which I think have an M3 stud sticking out the backside for a nut to secure it. Well, that's what all my generic IP centre buffers have.

A week after the painting disaster, the damaged paint on the bonnet was sanded back, and a little filler primer applied where needed with a small brush.

That night, the "motion" was removed followed by the wheelsets and all degreased prior to painting. Note the unusual flat fronts of the wheels. A cost-cutting measure but hardly noticeable.

The frames needed cleaning around the axleboxes too. This was done with cotton buds and meths.

Now those flat wheels were bugging me, so I turned a recess into the front of each one. Yes, I'm sad for spending 2 hours on something you'll never notice, especially when it's on a ground-level track, but it would've driven me fucking nuts had I left them. Note the chatter marks near the wheel centres - I never claimed to be a decent machinist just yet.

05/03/18
Frames cleaned up, ready for masking and paint.

Wheels and rods hanging up to dry, along with a couple parts from Roundhouse Fowler "Victoria".

Cranks and crankpins drying. The pins are resting in holes drilled in the stick, while the cranks are held on with that terrific stuff called blu-tac.

Headstocks after final coat. The shit in the paint on the left doesn't look nearly as bad in person, so it barely gets a pass.

06/03/18
Chassis masked off for paint.

3 coats of gloss black later..

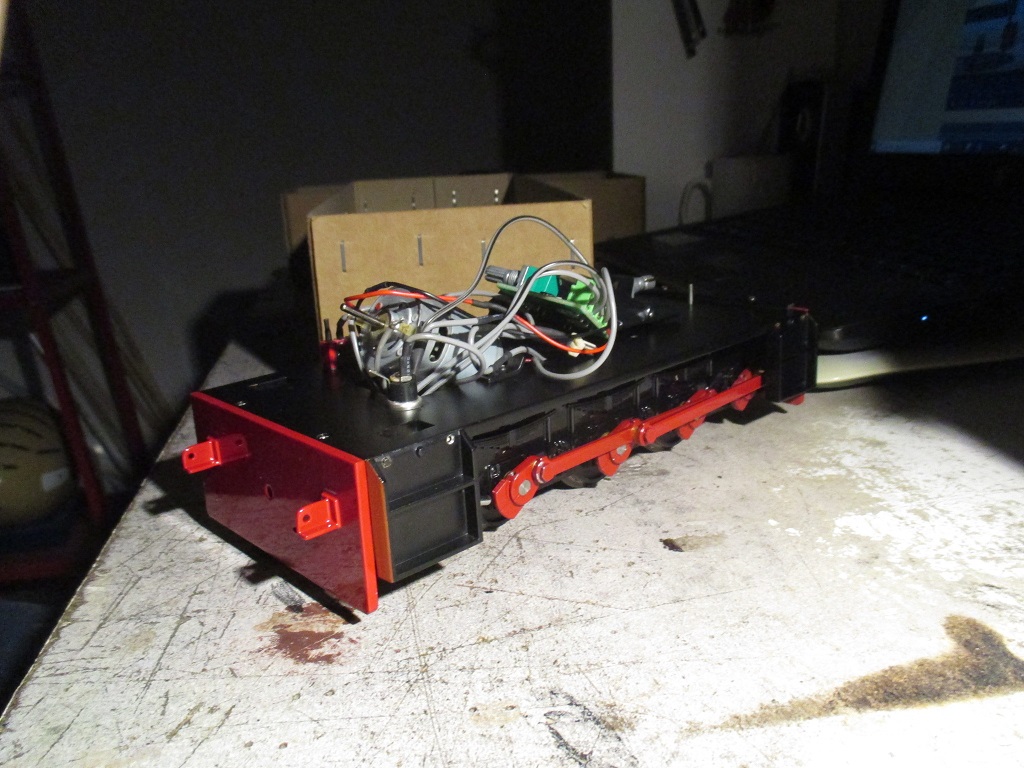
None of this new paint was hardened, but it was dry enough to handle, so I gave in to boredom and reassembled the chassis. Managed to break a tiny brass M1.6 screw reattaching the steps which is very annoying, but I've ordered a tap so I can drill it out and retap the hole so I can replace the broken one with a spare.
It's looking alright so far, I reckon. The axle ends will be primed and painted with a brush during final touchup, prior to weathering.
It's looking alright so far, I reckon. The axle ends will be primed and painted with a brush during final touchup, prior to weathering.
The damaged body paint was sanded down again, and given an initial coat of white to start building up the colour..
Part 3 here.
No comments:
Post a Comment